Sunday, May 26, 2013

Yet Another Pillowcase Dress

I know you all have seen a pillowcase dress before. And those who follow the handmade kids clothing have seen hundreds of versions of these. I know I have. Funny thing is I have never made one before and really had no interest in making one. I have been trying to challenge myself to expand my skills and I guess I never thought of a pillowcase dress would do that. 

Recently, I have been asked to make three pillowcase dresses so I have had to really examine the construction and ways to add detail to an otherwise plain dress.  Through this I have stumbled upon the guru of super cute pillowcase dresses (at lease I think she is). Destri of The Mother Huddle has perfected the pillowcase dress. Good construction with perfect detail. Not too over the top and just enough "wow, that's cute!"

Since I was not about to make a dress for someone else before trying it out I, of course, had to make one for Hannah. Not only do I love how it turned out but, I really enjoyed making it. I wouldn't say that it was overly challenging but it has just enough detail to make the processes interesting.


I love that Destri provides so many different detail options for this otherwise simple dress style; lined with a peek-a-boo hem, two methods for making a big bow sash, elastic no tie and front/back tie. Not to mention the fact that she provides size/cutting guide for sizes 3-6 months to 7/8. 


Hannah is wearing between an 18m & 2T so I went ahead and made hers a 2T with the front or back tie and a big bow sash.


The sash is a little too long for a 2T and I kinda wish I had  used the multi color paisley fabric instead for a little more pop. Even if I redo the sash I know I can find a dress to make to match this one.


The top stitching that outlines each fabric panel gives it that special touch, don't you think? 


Not to discount the awesomeness of this pillowcase dress. There is one thing I will try to do differently in the construction. I don't love that the side seams are finished after the bottom hem which is the band of folded fabric.  Not that this does not work and I can see why it was done this way. I just think that sewing the hem last looks more professional. When making clothes for others this is how I would like it to look. I am going to attempt to finish the body of the dresses side seams before adding the band. Wish me luck.

I highly recommend Destri's pillowcase dress tutorials offered on The Mother Huddle. Even if you are not a sewer but an admirer you must go checkout how pretty hers are.

Thanks for stopping by the nest!
Darla

Thursday, May 16, 2013

A New Look

I know, I know, its enormous! You can't help but see it. It's all still a work in progress. I am impatient and know if I don't do something it will never get done. My new motto as a mom "Better done imperfect then not done at all."

I have been working on coming up with the Little Quail design for the blog and clothing labels for weeks now. After bouncing idea's off of others and doing a lot of doodling I think I have finally come up with a good starting point. This may not be the final but I felt like it was good enough to at least post it for now. I was getting really tired of  just text. 


Here is the over all design:


The Label:


I already have the label image at Spoonflower (a fabric printer) so I can make my labels. I am following the do it yourself method recommended by See Kate Sew. I will post all about it when my fabric comes in.


For the blog header I had to chop up the over all design a bit in photoshop to get to be a little more reasonable. Took me forever just to get it to this point now I will need to lean on my husband to do the techno thing to make it fit right. 


I have had some brilliant idea's given to me by a good friend on how to take this a little further. Incorporating a little more detail that reflects the sewing aspect of what I do. That however is going to take some time. For now I hope you all enjoy my temporary drawling until something more permanent can be finished. 


Thanks for stopping by the nest!


Sunday, May 12, 2013

Grandma's Goetta Recipe

I am sure you all are wondering what in the world is Goetta. From my understanding it is a German dish. In our family we eat it for breakfast. Although, this would be good at dinner too. This meatloaf kind of thing is something our grandma would make regularly. As a kid I was not in love with it however, as an adult I love it! Not that this does not appeal to kids cause my 3 year-old loves it too. 


Goetta is a bit of a labor of love. It is precooked, packed into loaf pans then chilled/frozen until you are ready to fry it up to eat. My cousin figured out how to adapt the recipe for the slow cooker which limits your need to hovering over the stove during the precooking phase. This is a big help since I don't have time to babysit food when I have real babies that need my attention. 

Since most of the work is done up front, makes a ton and freezes wonderfully this makes it a great on hand meal. In fact when I put this post together for you I made a double batch (two slow cookers needed) so I won't need to make it again for a few months. This is actually a pretty healthy recipe too. The bulk of the loaf is steel cut/pinhead oats and I choose to make mine with a ground turkey & turkey sausage rather than the pork that grandma used. When I "fry" it up I don't use but a couple teaspoons of olive oil & my best nonstick skillet. I am sure grandma used lard or bacon fat in a cast iron pan. We serve it with eggs & toast however it really is a complete meal itself.


Gather your ingredients and get your slow cooker warming the water on high. (you won't need the 4 pound of meat you see here. I was making a double batch.) You can add your seasonings before or after the water is hot. This is the nice thing about using the slow cooker, you don't need to stress too much about stopping and starting or fuss too much over it. (with my two kids stopping and starting is necessary any ways)

After your water is hot and your seasonings are in stir in the oats. Cook on high for 1 1/2 hours. Its good to stir 2 - 3 times however I have set a timer and walked away and forgot to stir and it was just fine.

After the 1 1/2 hours reduce the slow cooker to low and stir in the onion. As you can see mine is very fine from the food processor. My family likes the onion and find we like it better when it is like this. 

Break up the ground turkey and sausage with your hands as you are adding it to the slow cooker. Trust me you will want to do this. The bigger the chucks you start with the more challenging it is to stir together.

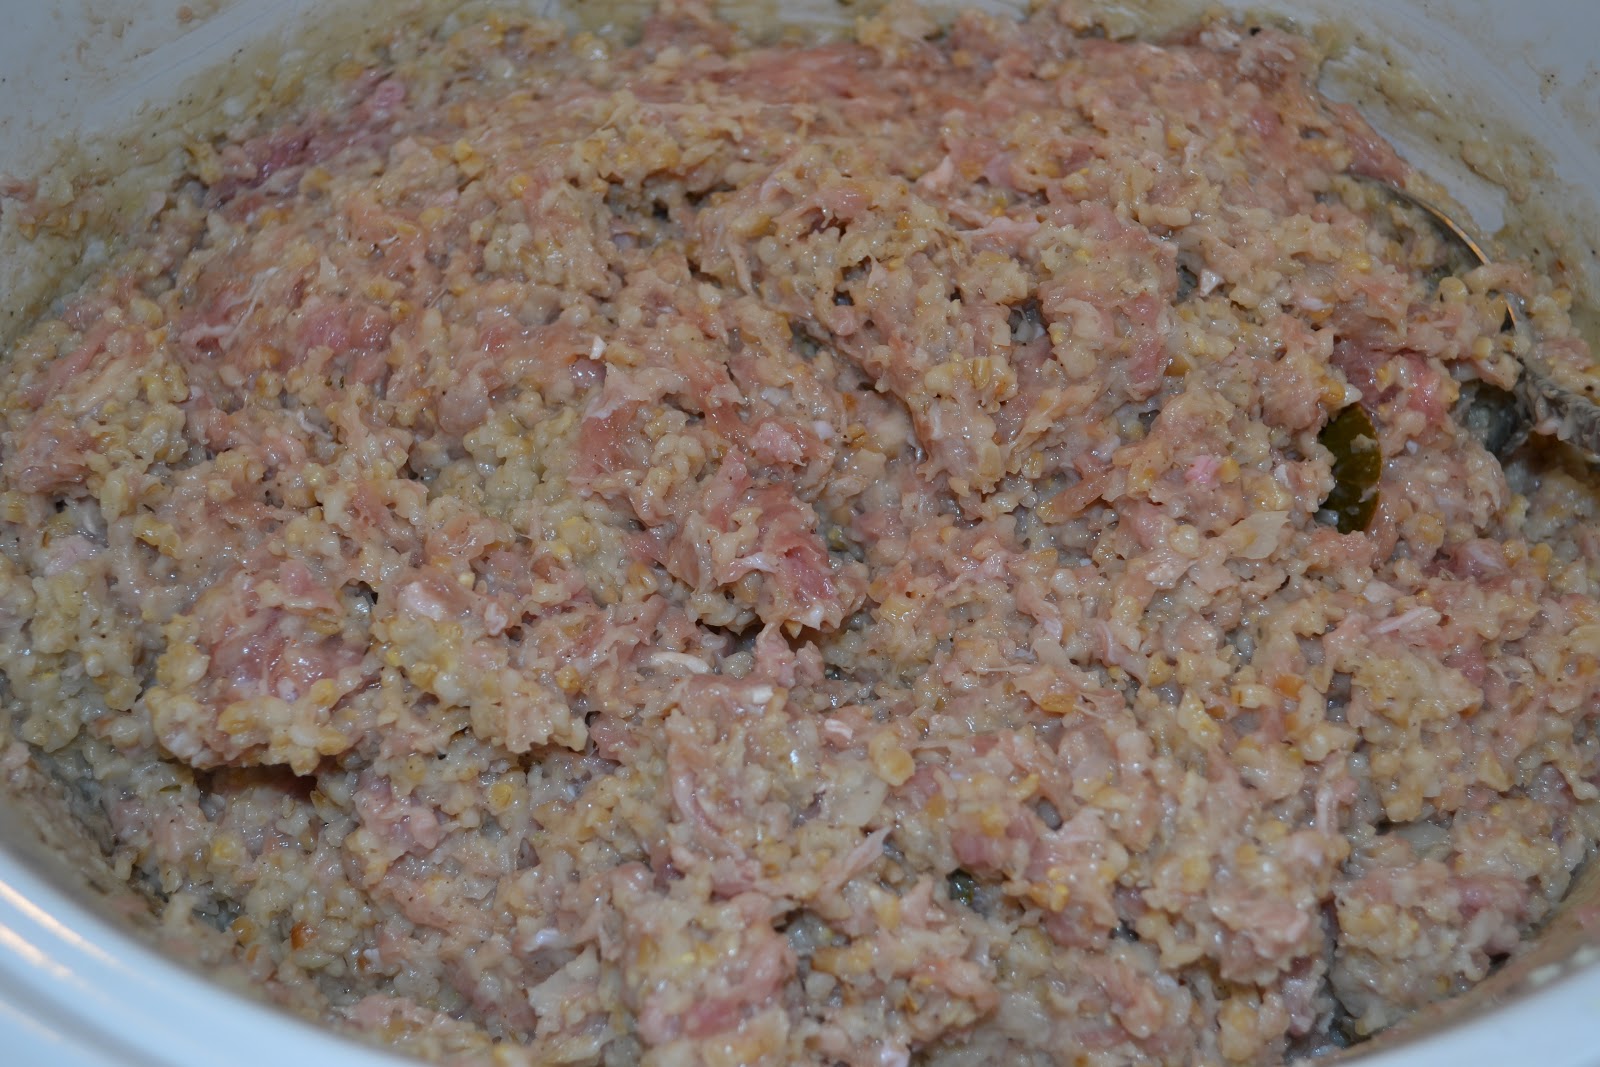
Now stir and stir and stir and stir some more. This is the most painful but necessary part of the process.  Once it looks something like this your done stirring. Cover and cook for 3 hours on the low setting.

When it looks something like this the slow cooker part is done and you can fish out your bay leaves. I let mine cool in the crock on the counter for an hour before the next step.

Divide the mixture between two standard size loaf pans. Make sure it is even and packed down. I lined my pans with plastic wrap (I have also used wax paper) to help me remove it from the pans later.  Cover and put the pans in the freezer for 6 - 12 hours. 

Remove the loafs from the pan, wrap in wax paper or plastic wrap then foil, label and put it back in the freezer for up to 3 months. Or you can place a loaf in an airtight container and store in the refrigerator for 3 days. 

Place 1/2 inch slices in a hot non stick skillet with oil or butter. It is key to use a good nonstick skillet. We have tried many different pans and found that the Green Pan is the best. Everything else has turned out in complete disaster. Your only other alternative is to use a ton of very hot oil to keep it from sticking and to stay together. The Green Pan is the best for eggs too. (I am not a Green Pan spokesperson, its just a good product)

Serve it with eggs, toast and good cup a coffee. Yum!

It may seem like an odd ball recipe but I really hope you try it. It really is yummy and a nice change from the old standards for breakfast.


Grandma's Goetta

Ingredients:


6 cups water
3 tsp salt
1/4 tsp pepper
2 large dried bay leaves
1/2 tsp dried rubbed sage
1/4 tsp dried thyme leaves
2 1/2 cups steel cut/pinhead oats
1 large onion finely chopped (I use my food processor for this)
1 lb ground turkey (beef can be used if you prefer)
1 lb bulk turkey sausage (pork sausage can be used if you prefer)

  1. Heat the water in the slow cooker with the salt, pepper, bay leaves, sage & thyme on high for about a half hour. 
  2. Stir in the oats and cook on high for 1 1/2 hour stirring a couple times.
  3. Stir in onions then the meat until everything is broken up and distributed well in the oats. Cover and cook for 3 more hours on LOW Stirring occasionally.
  4. Divide mixture between 2 standard size bread pans. Let cool then refrigerate until ready to use.
  5. Slice and "fry"/brown in a non-stick skillet with a light coating of oil or butter. Don't over crowd your pan only cook a couple at a time. When making several slices preheat your oven for warming. Move the cooked ones to a cookie sheet in the oven until you are ready to serve.
To Freeze: At step 4 put the cooled pans in the freezer for 12 hours/overnight. Remove the frozen loafs from the pans wrap in plastic wrap or wax paper then wrap in foil and put back in the freezer. Lasts in freezer for up to three months. When you are ready to use thaw in the refrigerator for at least over night then continue with step 5.

Thanks for stopping by the nest!
Darla

Monday, May 6, 2013

Recycled Little Boys Dress Shirt

Well I did it again, I stole a shirt from my son Samuel's closet for Hannah. This is only the second time I have done this (my first one can be seen here) and it technically didn't fit him any more so I don't feel too bad. I think I will just need to make him more clothes to make up for it. I really should have done a tutorial for this however did not have the pictures for it. So I will just give you a play-by-play.


This was a boy's 2t dress shirt. 


  1. The first thing I did was take my seam ripper to it. I carefully removed the pocket. Then removed the sleeves and the collar with the seam ripper (normally I would just cut them off but I just wasn't sure what I was doing yet so I wanted to save as much of the fabric as possible since this is for a 19month old).
  2. I wanted this fuller than the last one I made so with the seam ripper I opened up the sides from the bottom to about a 1/2 in. from the arm hole.
  3. I cut two triangle pieces that measured the length of the opening plus 1/2 in. for a 1/4 in seam allowance. For the width I used an existing 2t shirt of Hannah's that I liked the width of to gauge how wide to cut the triangle. 
  4. Using the serger, I stitched the triangle piece in place. With the sewing machine, I matched the hem for the pre-existing hemline on the shirt. 
  5. Using the sleeves that were removed, I cut the two flutter sleeves.  This was done by making a pattern from the same shirt I used in step 3. Then I serged all the way around the edge of both flutter sleeves.
  6. I cut a good 3 inches off the top of the shirt. I didn't measure I used the original back placket (you know, the kind you see on men's button down shirts) as my guide and just cut through both the front and back of the shirt. Then serged all of the raw edges.
  7. Using the serger I attached the flutter sleeves. Then sewed a 1/2 in casement all the way around the collar of course leaving a couple inches so I could thread the 1/4 in. elastic. Hannah tried on the shirt for me to determine how long I wanted the elastic to be, trimmed it and closed the casement opening.
All Done!


I made the leggings too. I used an old t-shirt of mine and the same pattern I always use. Their a little big but this way she can grow into them.


As you see I did not hem the edge of the sleeves. I left them with the serged edge which works. I did debate about hemming and adding an elastic band but changed my mind when I put it on her. Whats your thoughts add them or leave it as is?


Thanks for stopping by the nest!

Darla