Showing posts with label Prayers. Show all posts

Wednesday, September 30, 2015

Framed Prayers & Printing Tutorial

A couple years ago my bible study completed our Marian consecration using the 33 Day's to Morning Glory by Michael Gaitley. That next Christmas I framed one the Mother Teresa quotes that the book shared and gave it to my very dear cousin who is in my study group. She loved it so much that this past month she requested I make a handful of framed prayers and quotes for her to give as gifts. 
The style above and below is the same as I had given to her that two Christmas' ago. I knew exactly how I wanted to look before I started but had the worse time finding an intricate cut frame in my zillion Cricut images. It drive me nuts that most of the frames are not standard picture sizes and when you change the size in the craftroom it loses what you liked about it in the first place. So I came up with this frame I used multiple cuts from the Ornamental Irons II cartridge and welded them together in the Craftroom, It was rather labor intensive since the Craftroom doesn't like when you over design things. I hope this is something I hope they remedied in the new Design Space software for the Cricut Explore. I have included the Craftroom file below if you are interested in using it. You will need to own the Oriental Irons II cartridge to complete the cuts.
These are 8"x10" frames and the center rectangles are 5"x7". With some finessing the scroll frame size can be changed in the Craftroom but as it is now it is set to overlap the 5"x7" cut/picture. 
I used the Snell Roundhand font for Mother Teresa's prayer. This font can be found free on the internet if you don't already have them on your computer.
Another one of the prayers she asked for was the Humility Prayer. This one was rather challenging since it is long and you really can't alter the format. The frame I found is from the Cake Basics cartridge. I'm not sure how someone would used this design on a cake??? Maybe on a sheet cake? Any way's, I digress, It works perfect for this. I find that I use this cartridge and the Holiday Cakes a lot. If you have avoided these thinking that they aren't usable for paper crafting, don't! These have the best fonts and are great for card making.
This is a 5"x7" frame. If you have any interest in making your own, the cut file is below but you will need the Cake Basics cartridge to use it.
Cricut Craftroom File (CCR)
Another challenge for this one was finding a font that is easy to read but still attractive. I end up settling on Baskerville & 5th Grade Cursive. Again, these fonts can be found free on the internet if you don't already have them on your computer.

The Humility prayer was another one of these that is printed out after the base was cut. As I mentioned I would last week, I put together a tutorial on how I do that. It's really quite easy.
I use 8.5"x11" grid paper and double sided removable tape. 
1. Cut the images. The base that will be printed on and the frame that will be layered on top of it,
2. Print the verse on the grid paper. Line up the frame around the printed verse so it appears in the center or how you would like it to look. 
3. Put pencil dots at key points around the frame like shown above.
4. Remove frame and stick two strips of removable double sided tape at the top and the bottom of the printing area.
 5. Remove the backing of the tape. Using the pencil marks and the grid lines to make sure it is level, adhere the cut that you would like to printed on.  
 6. Make sure the paper is put in the printer going the correct direction. Mine is face up head first. Then print.
 It should peel off easily and be lined up perfectly! Now glue it together and finish up your project : )
Thanks for stopping by the nest & God Bless!

Darla

Sunday, March 1, 2015

Lenten Sewing - Rosary Pouches with Tutorial


Every Advent and Lent we try to pray the rosary as a family daily. Since most of us are 5 years and under we do the best that we can. It's usually a little nutty; we have to take pauses to stop arguments and sooth tears. Just like Sunday mass I believe that these habits will leave lasting effects on my kids. Plus, as parents, I think we are given a little penitential credit for our suffering through : )

Over the past few years my husband has asked me to make him a little pouch for his rosary and sadly something has always come before it. This is not the only project like this I need to do or have started by not completed. I am hoping this Lent to complete these projects. I am thinking one every week:

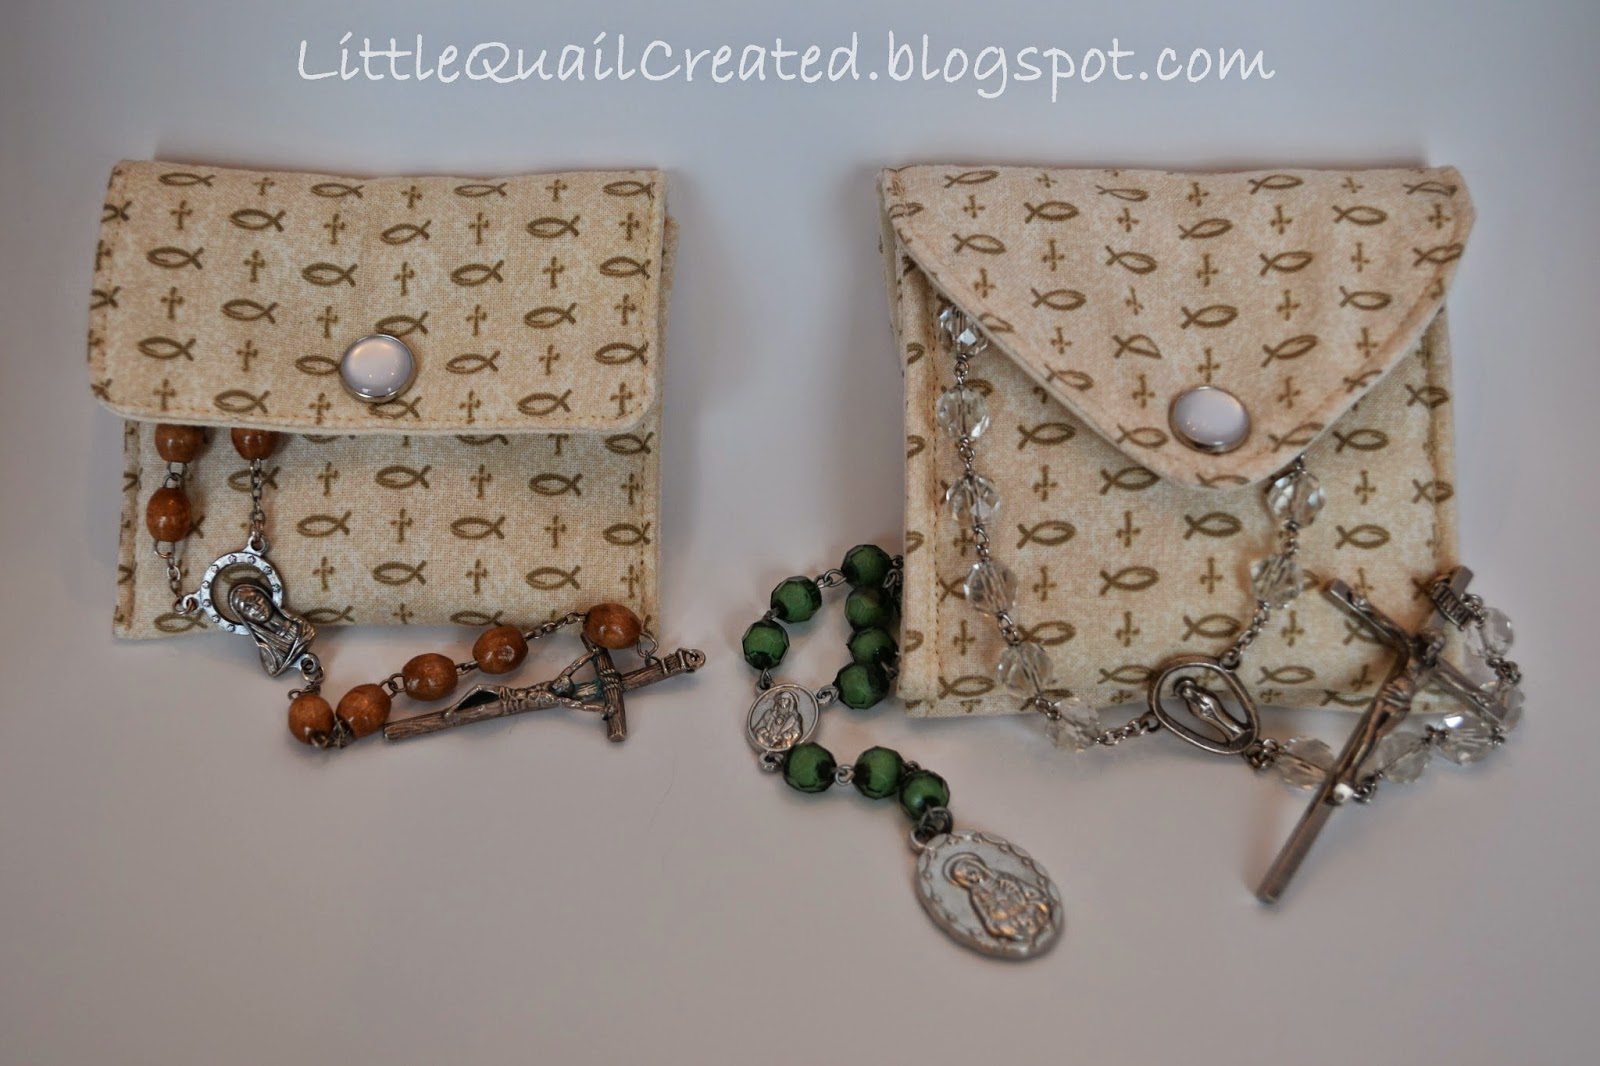
Rosary Pouch a single and a double (I'll explain that more in a bit)
Bible Study Bag
Adoration/Prayer Bag
Bible Cover

And somewhere in the middle I need to make Hannah's Easter dress.

I have three "tools" I use to pray the rosary, my traditional 5 deck rosary beads, the Laudate phone app (which is totally awesome! Check it out here, its free!) and my seven sorrows rosary. Of course tools of any kind are not necessary to pray the rosary; you can use your fingers or toes if you want. With my chaotic life I find its is easier for me to use the beads especially for the seven sorrows since it doesn't follow the same 5 deck/10 bead path.

Some of you may be scratching your heads wondering what I am talking about, seven sorrows rosary. I am always surprised how many people are not familiar with Our Lady of Kibeho Marian apparition's in Rwanda. I have even run in to those who follow the call to religious life who have not hear of this Vatican approved Marian apparition. The seven sorrows rosary is not new, Our Lady just brought it back to life during her visits to Kibeho in the 1980's.

I became familiar with it after reading Our Lady of Kibeho book by Immaculée Ilibagiza who is a survivor of the 1994 genocide in Rwanda, which Our Lady had foretold in the 1980's. (She also wrote Left to Tell which goes in to greater detail of her experience during the genocide. Both would be great Lenten reads)

The book provides a nice visual as to how to pray the seven sorrows and you can buy the seven sorrows rosary beads on Immaculée website (I have also seen them in my local Catholic bookstores.) I was lucky to pick mine up during a retreat with Immaculée a couple years ago. I've been out looking for the nice visual version on the Internet but wasn't able to find it. There are a ton of websites out there that provide you with what you need to know to pray it like this one here.

Since I have the two rosary's I would like to keep them together so I am not having to hunt for one or the other. I have tried keeping them together in the same pouch but they have gotten tangled. My solution is a double pouch.

I have put together a pattern and a picture tutorial to make the double rosary pouch tutorial. Even though I made both the single and double pouches I figured that the double pouch is worthy of the tutorial since it is unique and a bit more involved. If you are interested in information on the single pouch leave me a comment or send me a message.


***Revised on March 11, 2015***


Double Rosary Pouch Tutorial 

Supplies:
1/4 yard of outer fabric (1/2 yard if your fabric has a directional pattern)
1/4 yard of lining fabric
1/4 yard of fusible fleece
2 - 1/2" snaps
Coordinating thread
Flap Patterns(found here)

1.Cut out the fabric and fleece:
2. Fuse the fleece to the wrong side of the outer fabric for the pocket piece and the flap piece.3. With the right sides of the outer and lining fabric facing for both the pocket piece and the flap piece stitch all the way around leaving open a section for turning right side out.
4. Turn right side out, press and top stitch:
5.Mark the stitch lines to connect the flap piece to the pocket piece:

6. Pin together and sew:
7. Mark the stitch line to connect the two pockets and sew (don't forget to back stitch):8. Fold up the pocket fronts and pin in place:9. Hand stitch down the sides of each of the pockets separately. This will leave an opening or tunnel between the two pockets providing more room for each pocket when it is filled.
10. Install the snaps:
All Done!
The Cross and Fish fabric is by Cranston Village purchased at Hobby Lobby a couple years ago so it may not be available and the lining is a basic natural muslin which is available at most fabric shops.

I didn't go into great detail on this project because it is very simple and only takes about 30 minutes to complete. If you have any questions please leave me a comment or send me a message and I will do my best to respond as prompt as possible.

Remember prayers are always answered it just may not be how or when you expected it.

Thanks for stopping by the nest!
Darla