Tuesday, April 5, 2016

I've been Published!

It's only a little spot in an Australian sewing magazine but this is the first time for me so it feels like a great accomplishment to have my work noticed and appreciated. The publication was in the January 2016 Issue of Homespun (I know, I know I am so horrible at keep up with my blog posts). When my issue arrived I was really impressed with the magazine. This baby was thick. There is so much wonderful content and lots of great articles with many patterns included.  
Since January south of the equator is summer they did their Kids Katwalk layout on sundresses. I was completely giddy to see that I was included with studios & sewist I admire like Ikat Bag, Peek-a-Boo Patterns, Mouse House Creations and Compagnie-M.
Homespun selected the blue and orange pillowcase dress I made for the summer kids clothes week in 2013 that I originally posted here
This little accomplishment has encouraged me to get back to sewing for my kids and to try some things I haven't done yet. If memory serves the spring Kids Clothes Week should be coming up here soon. Time to do some planning.

Thanks for stopping by the nest!

Darla

Saturday, March 19, 2016

T Shirt Twirly Dress are available!... Finally


So finally, after a rash of interest in the t-shirt twirly dresses again, I gathered up all of my current stock and got them listed on Esty's yesterday. When I originally posted these dresses here, I planned on putting them in the Etsy's shop but new projects kept getting in the way of me getting it done (the curse of the creative person :).  I have 8 dresses left sizes 18 months - 5T and are in a variety of colors and styles. 

 
The pink and yellow is a 3T and the Purple is 24 month/2T
 The gray scale dress is 18 months and red & black is 24month/2T
 
The circle skirt dress is 24month/2T and the black and white is 24 month/2T
The scarlet & gray (OSU inspired) dress is 4T and the green & black is 5T
 All of the flowers and yoyo's come removable and
can be worn on the dress or in a little ones hair.
Most of what I made over the past couple years has been custom order requests. Right now I am no longer taking custom requests but I do have plans to make more dress as I have time that I will add to the shop.

I've also had many requests for the sewing pattern. I have hope of creating the PDF pattern this year but I am not sure if I am going to sell it or just post it for free. Please check back from time to time for the pattern if you are interested.

Thanks for stopping by the nest!
Darla

Friday, January 29, 2016

I love you but no

So here I am again, almost six months since my last post, again. It makes me sad when I think of the lists and lists of project ideas I like to create and posts that I want write. On almost a daily basis I ask myself "Where is all my time going? How do I get six months from even writing a draft of a post? Why am I letting things keep me from doing what I love? What keeps me away?" It's not my husband or children, they are what inspire me in the first place. And it's not laziness or lack of organization. I've come to the realization that I am over committed. Like most women I know, I have a really hard time saying "No". It's that "Yes, I can (fill in the blank here)" that fills in the next blank spot in my calendar that's eating my time, Oh, that beautiful blank spot that was going to let me try that pattern that has been collecting dust since I bought it a year ago. I've even said "Yes" so much that I have had to force myself to work on a project while listening to my husband play a board game with the kids that I would love to join in on. 

It's time for a change. It's time to regain some control of my time. So sadly, "I love you but no I can not.... sew on your childs scout badge" or make your window treatments" or help out the play by making costumes" or be in charge of this year's VBS craft table" or teach your child to sew" etc. At my present stage of life with 3 small children 80%-90% of my time is dedicated to my little family. I am reclaiming that 10%(ish) for my sanity. So, I love you but no and I know you love me so you will understand. There will be a day that my kids won't need or even want so much of me and I will have more to give but that day or year is not here yet. Be patient and don't forget about me or even stop asking for help but understand why I have to say "No" now. This "No"is going to allow me to say "yes" to so many other good things, like playing with my family, having the energy to talk to my husband in the evenings, catch up on my spiritual reading  and writing that blog post during naptime.

I am going to stop making promises too. I have hopes of being more consistent but I coming to accept that life is unpredictable, especially with three kids 5 and under. It never fails when I promise to do something someone gets sick or needs a little more loving attention then normal. The only promise I can make right now is to put my kids first and give them the love and attention they deserve.  I am going to work to stay very present and in the moment and not plan to far ahead. That said I am not going to promise any blog series or future post for patterns. My posts maybe very sporadic and lacking as much detail but as time permits I hope to give current crafting events and provide inspiration. 

Thanks for listening : )

Darla

Wednesday, September 30, 2015

Framed Prayers & Printing Tutorial

A couple years ago my bible study completed our Marian consecration using the 33 Day's to Morning Glory by Michael Gaitley. That next Christmas I framed one the Mother Teresa quotes that the book shared and gave it to my very dear cousin who is in my study group. She loved it so much that this past month she requested I make a handful of framed prayers and quotes for her to give as gifts. 
The style above and below is the same as I had given to her that two Christmas' ago. I knew exactly how I wanted to look before I started but had the worse time finding an intricate cut frame in my zillion Cricut images. It drive me nuts that most of the frames are not standard picture sizes and when you change the size in the craftroom it loses what you liked about it in the first place. So I came up with this frame I used multiple cuts from the Ornamental Irons II cartridge and welded them together in the Craftroom, It was rather labor intensive since the Craftroom doesn't like when you over design things. I hope this is something I hope they remedied in the new Design Space software for the Cricut Explore. I have included the Craftroom file below if you are interested in using it. You will need to own the Oriental Irons II cartridge to complete the cuts.
These are 8"x10" frames and the center rectangles are 5"x7". With some finessing the scroll frame size can be changed in the Craftroom but as it is now it is set to overlap the 5"x7" cut/picture. 
I used the Snell Roundhand font for Mother Teresa's prayer. This font can be found free on the internet if you don't already have them on your computer.
Another one of the prayers she asked for was the Humility Prayer. This one was rather challenging since it is long and you really can't alter the format. The frame I found is from the Cake Basics cartridge. I'm not sure how someone would used this design on a cake??? Maybe on a sheet cake? Any way's, I digress, It works perfect for this. I find that I use this cartridge and the Holiday Cakes a lot. If you have avoided these thinking that they aren't usable for paper crafting, don't! These have the best fonts and are great for card making.
This is a 5"x7" frame. If you have any interest in making your own, the cut file is below but you will need the Cake Basics cartridge to use it.
Cricut Craftroom File (CCR)
Another challenge for this one was finding a font that is easy to read but still attractive. I end up settling on Baskerville & 5th Grade Cursive. Again, these fonts can be found free on the internet if you don't already have them on your computer.

The Humility prayer was another one of these that is printed out after the base was cut. As I mentioned I would last week, I put together a tutorial on how I do that. It's really quite easy.
I use 8.5"x11" grid paper and double sided removable tape. 
1. Cut the images. The base that will be printed on and the frame that will be layered on top of it,
2. Print the verse on the grid paper. Line up the frame around the printed verse so it appears in the center or how you would like it to look. 
3. Put pencil dots at key points around the frame like shown above.
4. Remove frame and stick two strips of removable double sided tape at the top and the bottom of the printing area.
 5. Remove the backing of the tape. Using the pencil marks and the grid lines to make sure it is level, adhere the cut that you would like to printed on.  
 6. Make sure the paper is put in the printer going the correct direction. Mine is face up head first. Then print.
 It should peel off easily and be lined up perfectly! Now glue it together and finish up your project : )
Thanks for stopping by the nest & God Bless!

Darla

Wednesday, September 23, 2015

Apple Picking Birthday Invitation

My little girl turns 4 today! It pretty exciting for us. Lots of new things like school and car booster seats. She's going to be pretty excited today when I pick her up from school and she won't have a car seat anymore. It's the little things that make us happy around here : )

So for the second year now Hannah is having an apple picking party for her birthday. Last year I choose apple picking cause what the hey, kill two birds with one stone, she wanted a party and I needed to apple pick. This year she asked for it. I'm happy she did. It's so much fun to do with friends and family and most u-pick orchards our happy to let you picnic.

This year I put together this apple picking invitation which was a bit labor intensive but well worth it I think. I used the Cricut again. The apple tree is from the Create a Critter 2 cartridge and the frame is from the When I Was a Kid cartridge. All of the paper is from a 12"x12" multipack from Target. The card base is 6"x 6". I used two fonts, Cinnamon cake for the title & Apple cider daydreams for all the sub text, Appropriately named don't you think! These fonts can be found free on the internet if you don't already have them on your computer.

Below is a link to the Cricut Craftroom File if you are interested in making your own. You will have to own the Cricut cartridges to enable you to cut though.
Cricut Craftroom File (CCR)

Thanks for stopping by the nest!
Darla

Tuesday, September 22, 2015

Baptism Invitation

Another one of my paper projects this past month was for baptism invitations. My friend was having a hard time locating an invitation that she liked and asked me to put some together for her. Her little darling is such a cutie, anytime I think of color combinations for her I think of delicate pinks. 

I love how the two tone pinks came out and the scroll work frame gives it a nice sophistication. Having to blot out a good portion of the text for privacy I lost how attractive it really is but I think you can get the picture.


The cuts are from the Sentimentals cartridge and the base measures 5.75"x8". The paper is a basic white card stock, Pick Tutu & Pinkini by Bazzill. The fonts I used are Bickham Script for the title & Baskerville for the rest. These fonts can be found free on the internet if you don't already have them on your computer.


Below is a link to the Cricut Craftroom File if you are interested in making your own. You will have to own the Sentimentals cartridge to enable you to cut though.
Cricut Craftroom file (CCR)

Thanks for stopping by the nest!

Darla
Monday, September 21, 2015

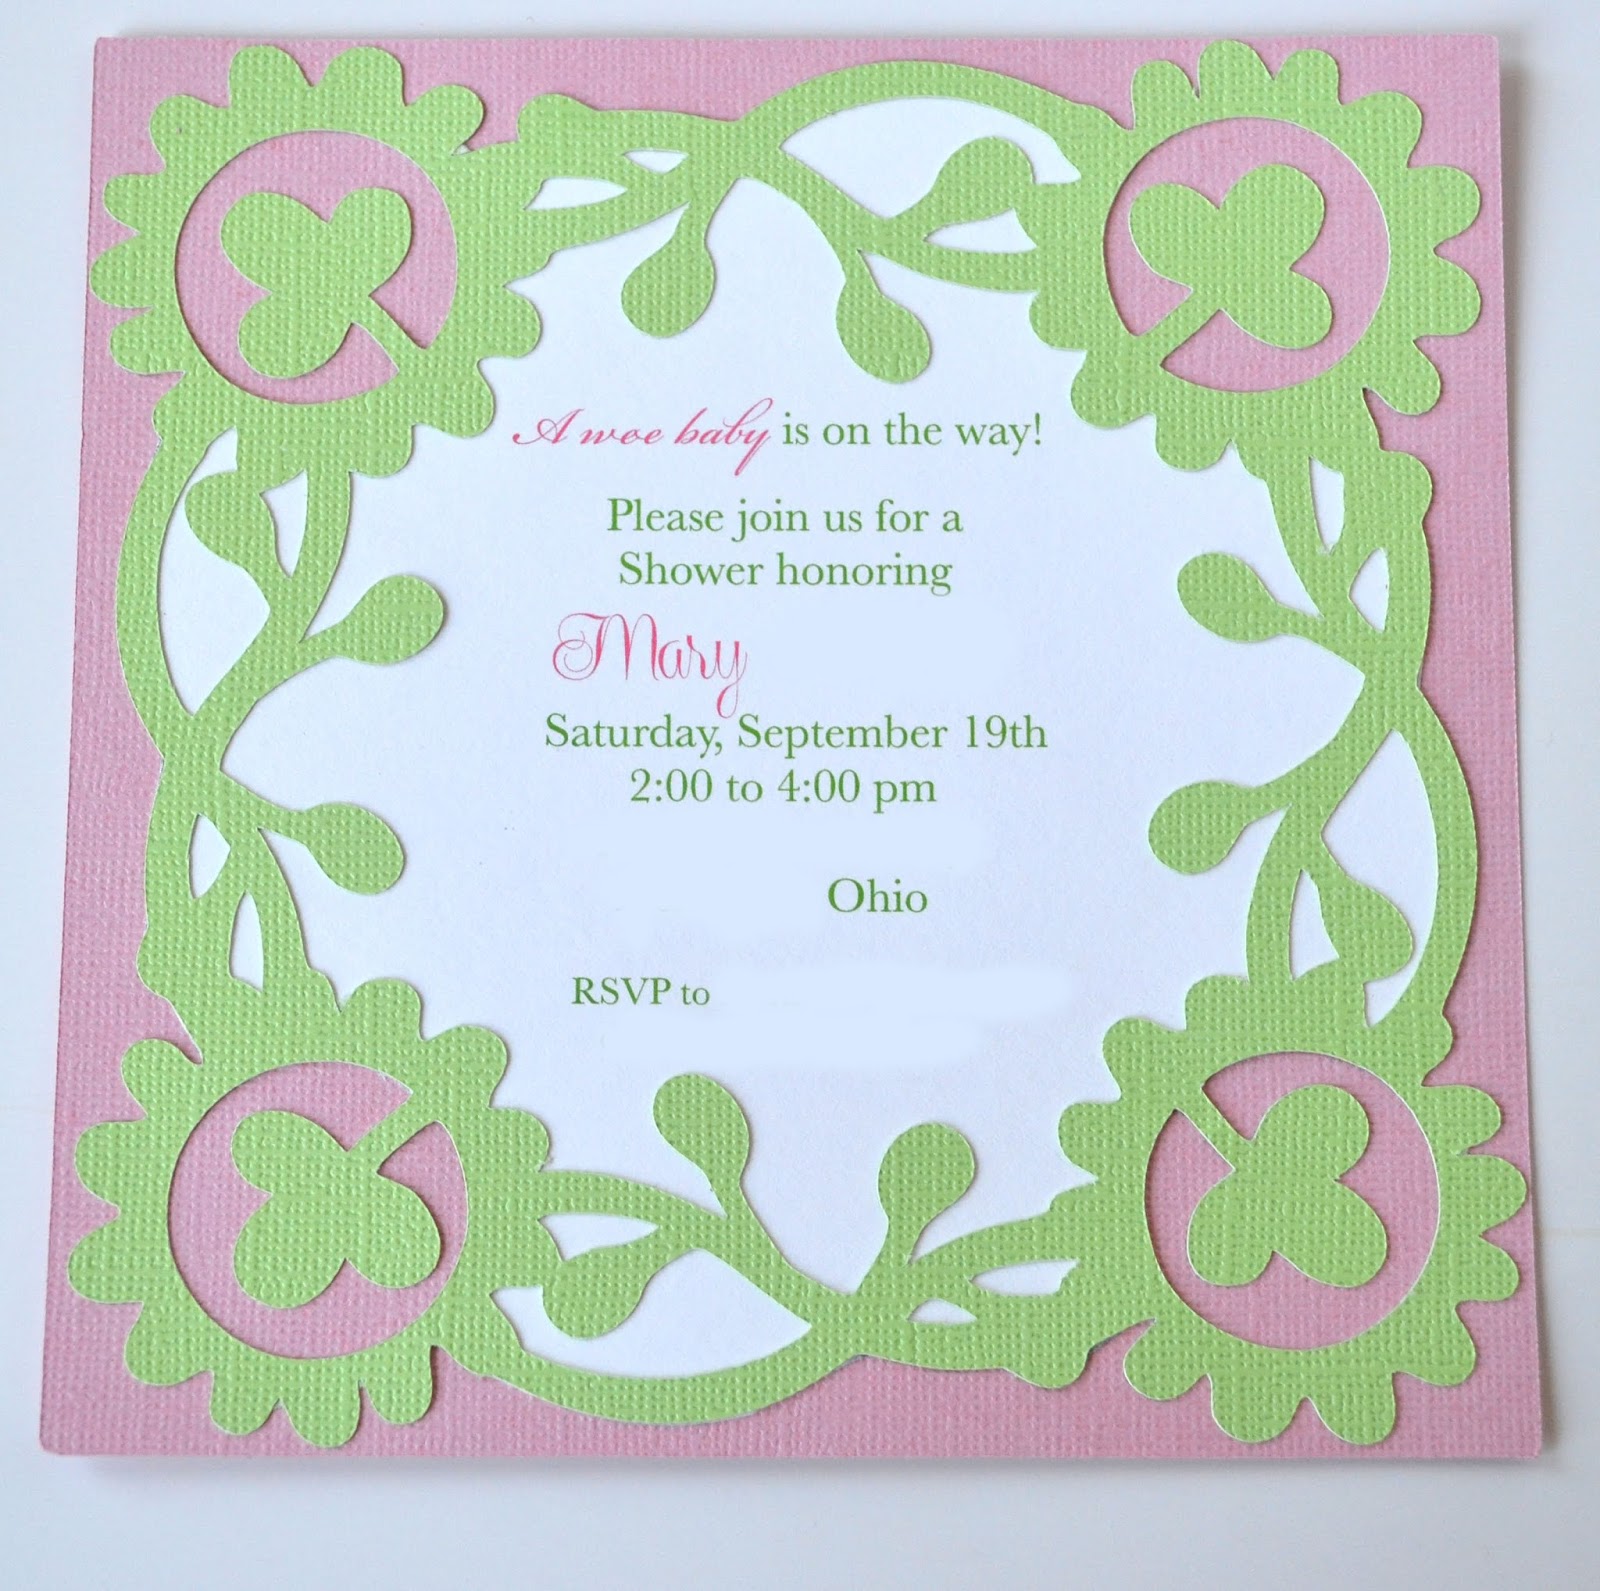
Baby Shower Invitation


This past weekend I hosted a baby shower for good friend of mine. They are have a little girl next month and planning to name her Bridgid after St. Brigid of Kildare so of course it had to be an Irish themed party. I searched and search for a shamrock/clover design that wasn't to cartoony and very feminine. Wow that was a challenge but in the end I think I got what I was looking for.

I keep the invitation really simple and used my trusty Cricut. The cuts are from the Storybook cartridge and the base measures 6"x6". The paper is Baby Pink by core'dinations, Apple Green by core'dinations & Basic White. The fonts I used Bickham Script for the title (a wee baby), Centeria Script for the guest of honors name & Baskerville for the rest. These fonts can be found free on the internet if you don't already have them on your computer.

Below is a link to the Cricut Craftroom File if you are interested in making your own. You will have to own the storybook cartridge to enable you to cut though
Cricut Craftroom File (CCR)

I figured out a pretty nifty way to print the text on already cut pieces. I'm going to try to put together a tutorial to share this week,

Thanks for stopping by the nest!
Darla